Chat Interface
The Chat interface is the primary way to interact with AI in Sciorex. It provides a rich, conversational experience with full access to all AI capabilities, tool controls, and session management.
Overview
The Chat interface allows you to:
- Converse with AI using natural language
- Control tool access and permissions per-session
- Manage conversation history with labels and filtering
- Branch conversations to explore different approaches
- Link sessions to tickets for project context
- Use extended thinking for complex problems
Accessing Chat
Navigate to the Chat section from the left sidebar. You'll see:
- Session List (left panel) - Your conversation history
- Chat View (center panel) - The active conversation
- Input Area (bottom) - Message composer with controls
Starting a New Chat
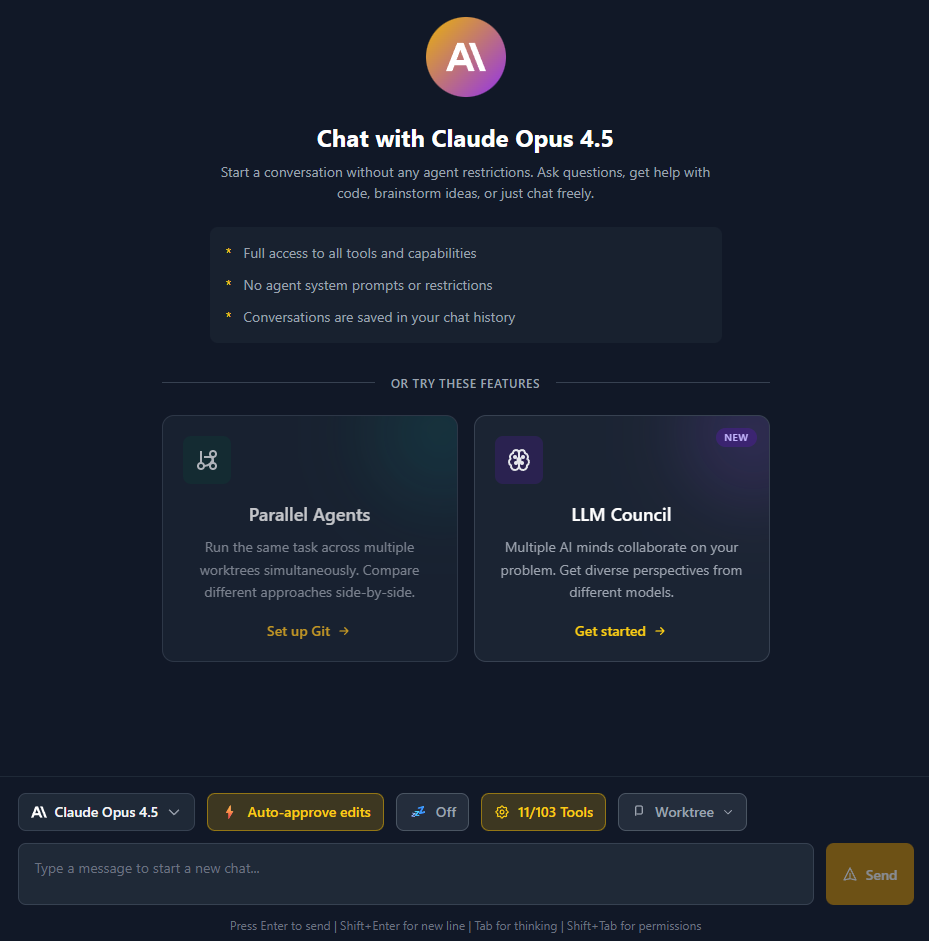
Welcome Screen
When no session is selected, you'll see the welcome screen with a message input. This is where you start new conversations.
Input Controls
The chat input area includes several selectors:
Provider & Model Selector
Choose which AI provider and model to use:
Providers:
- Claude Code - Claude models (Opus, Sonnet, Haiku)
- Google Gemini - Gemini models (Pro, Flash)
- OpenAI Codex - GPT/Codex models
- OpenCode - Multi-provider models via OpenCode CLI
- LM Studio - Local models via LM Studio
- Ollama - Local models via Ollama
Popular Models:
| Model | Provider | Description |
|---|---|---|
| Opus 4.6 | Claude | Maximum capability (latest) |
| Sonnet 5.0 | Claude | Balanced performance (default) |
| Gemini 3 Pro | Gemini | Latest Gemini flagship |
| GPT-5.3 Codex | Codex | Code-optimized (latest) |
| qwen2.5-coder | Local | Privacy-focused coding |
See Models Reference for the complete list.
Permission Mode Selector
Controls how the AI requests permission for tool use:
| Mode | Icon | Description |
|---|---|---|
| Ask for all | ??? | Prompt for permission on every tool call (safest) |
| Auto-approve edits | ? | Auto-approve file edits, ask for bash/dangerous ops |
| YOLO Mode | ?? | Skip all permission checks (use with caution!) |
YOLO Mode
YOLO mode bypasses all safety checks. Only use this for trusted, low-risk operations where you're confident in the AI's actions.
Thinking Level Selector
Enable extended thinking for complex problems:
| Level | Icon | Description | Token Budget |
|---|---|---|---|
| Off | ?? | No extended thinking | 0 |
| Think | ?? | Light reasoning | 1,024 |
| Think Hard | ?? | Deep analysis | 10,000 |
| Think Harder | ?? | Intensive reasoning | 16,000 |
| Ultrathink | ? | Maximum depth | 32,000 |
Keyboard Shortcuts
- Press
Tabto cycle through thinking levels - Press
Shift+Tabto cycle through permission modes
Customizing Defaults
Change the default thinking level and token budgets in Settings AI Providers.
Effort Level Selector
For Claude Opus 4.6, an additional Effort Level selector controls how much reasoning the model applies:
| Level | Description |
|---|---|
| Low | Minimal reasoning, fastest responses |
| Medium | Balanced reasoning |
| High | Thorough analysis (default) |
| Max | Maximum reasoning depth |
Effort Levels and Thinking Levels can be combined for fine-grained control. For example: Think Hard + Max effort gives the deepest analysis.
TIP
Effort Levels only appear when Claude Opus 4.6 is selected. Other models and providers do not support this feature.
File Attachments
Attach files to your messages for multimodal input:
| Type | Extensions | Description |
|---|---|---|
| Image | .png, .jpg, .gif, .webp, .svg | Analyzed visually by vision-capable models |
.pdf | Opened and read for content analysis | |
| Text | .txt, .md, .csv, .json, .xml | Included as text context |
| File | Any | Attached as reference |
How to attach:
- Drag and drop files onto the chat input
- Click the attachment button in the input toolbar
- Paste images from clipboard
TIP
Attachments work best with vision-capable models (Claude Opus, Sonnet, Gemini Pro/Flash). Local models may not support image analysis.
Tool Selector
Control which tools the AI can use in this session:
- Click the ?? Tools button
- Toggle individual tools on/off
- Use presets like "Built-in only" or "All tools"
See MCP Servers for detailed tool documentation.
Chat Sessions
Session List
The left panel shows your conversation history, sorted by most recent first. Each session displays:
- Title - Auto-generated from first message or custom title
- Status - Running, completed, failed, or cancelled
- Timestamp - When the session was last updated
- Message count - Number of messages in the conversation
- Labels - Colored tags for organization
- Fork indicators - Shows if the session is a branch or has branches
Session Actions
Hover over a session to reveal action buttons:
| Action | Description |
|---|---|
| Label | Manage labels for this session |
| Delete | Delete or archive the session |
Archiving Sessions
When deleting a session, you have the option to archive it instead:
- Click the delete button
- In the modal, select a ticket or epic to link to
- Click "Archive Chat"
Archived sessions are preserved and accessible from the linked ticket's Sessions tab.
Session Labels
Labels help organize your conversations:
Default Labels
Sciorex includes predefined labels that cannot be deleted:
- Important - Mark critical conversations
- Follow-up - Sessions that need continued attention
- Reference - Useful information for later
Custom Labels
Create your own labels:
- Click the label button on any session
- Click "+ Create new label"
- Enter a name and choose a color
- The label is automatically assigned
Filtering by Label
Use the filter controls at the top of the session list:
- Click on label chips to filter
- Multiple labels can be selected (OR filter)
- Click "Clear" to remove filters
Grouping by Label
Toggle "Group by label" to organize sessions into collapsible sections.
Chat View
Display Modes
The chat view supports four display modes, accessible via the toggle in the header:
Extended Mode (Default)
- Full message content displayed
- Tool calls shown with inputs and results
- Best for detailed review and understanding
Compact Mode
- Condensed message display
- Tool calls collapsed by default
- Good for quick overview of long conversations
Focus Mode
- Minimal UI distraction
- Only essential information shown
- Ideal for focused work
Agentic Mode
- Optimized for autonomous agent execution
- Tool calls displayed inline with compact output
- Progress indicators for multi-step operations
- Best for watching agents work through complex tasks
Messages
Messages are displayed in conversation order with role indicators:
| Role | Display |
|---|---|
| User | Your messages, right-aligned |
| Assistant | Claude's responses, left-aligned |
| Tool Use | Tool calls with expandable details |
| Tool Result | Results from tool execution |
| System | System messages and status updates |
Tool Call Display
When Claude uses a tool, you'll see:
- Tool name with icon
- Input parameters (expandable)
- Execution result (when complete)
- Status indicators for pending/running/completed
Supported Tools with Custom Display
The following tools have specialized visualizations:
| Tool | Display Format |
|---|---|
| Read | File path with syntax highlighting |
| Write | File path with content preview |
| Edit | File path with diff view (split or unified) |
| Bash | Command with $ prefix, background indicator |
| BashOutput | Task ID reference |
| Glob | Pattern and path display |
| Grep | Search pattern and results |
| WebFetch | URL with truncation |
| WebSearch | Query display |
| Task | Subagent type and description |
| TodoWrite | Todo count with expandable list |
| KillShell | Task ID being terminated |
Diff View Modes
For Edit tool calls, you can toggle between two diff views:
Split View (Default)
- Old content shown in red block
- New content shown in green block
- Good for seeing full context
Unified View
- Git-style unified diff format
- Lines prefixed with
+(added) or-(removed) - More compact, shows changes inline
Changing Default Diff View
Configure your preferred diff view in Settings Editor Default Diff View.
Tool Results
Tool results appear below tool calls with:
- Result content (formatted for readability)
- "Go to call" link to jump to the corresponding tool call
- Expandable for long results
Thinking Display
When extended thinking is enabled, you'll see Claude's reasoning process:
- Purple-themed collapsible block
- Appears before the main response
- Can be expanded/collapsed
- Shows timestamp
- Long thinking content can be truncated
Usage Summary
At the end of a response, you may see a usage summary:
| Metric | Description |
|---|---|
| Cost | API cost in USD |
| Duration | Response time |
| Speed | Tokens per second |
| Tokens | Input, output, and cached counts |
Session Header
The session header displays key information and provides quick actions:
Session Info Display
- Icon - Agent icon or chat icon for plain chats
- Title - Click to edit, auto-saves on blur
- Start time - When the session began
- Duration - Elapsed time (updates live for running sessions)
- Model badge - Which Claude model is being used
- Permission mode badge - Current permission setting
- Status badge - Running, completed, failed, etc.
- Linked ticket badge - If linked to a ticket
- Linked epic badge - If linked to an epic
Session Options Menu
Click the three-dot menu to access:
| Option | Description |
|---|---|
| Go to Parent | Navigate to parent session (for forks) |
| Link to Ticket | Associate with a ticket |
| Unlink Ticket | Remove ticket association |
| Link to Epic | Associate with an epic |
| Unlink Epic | Remove epic association |
| Archive | Archive session with link |
| Unarchive | Restore archived session |
| Delete Chat | Permanently remove session |
Linking Behavior
When linking sessions to tickets and epics:
- Linking to a ticket that has an epic automatically links to that epic
- When session is linked to an epic, only tickets from that epic are shown
- Archived sessions require at least one link (ticket or epic)
- Unlinking from an archived session shows a warning
Interaction Requests
Claude can ask questions during execution using the sciorex_ask_user tool:
Question Types
| Type | Description |
|---|---|
| Single | Radio button selection (pick one) |
| Multiple | Checkbox selection (pick many) |
| Text | Free-form text input |
Interaction Modal
When Claude asks a question:
- Question text is displayed prominently
- Context information if provided
- Predefined options (if any)
- Text input field (if enabled)
- Skip option for optional questions
- Urgency indicator (blocking, important, optional)
Responding
- Select from predefined options and/or enter custom text
- Click "Submit" to send your response
- Claude continues with your input
Retry Functionality
When a session fails or is cancelled, you can retry:
Retry Indicator
On the last user message, you'll see:
- Red warning indicator
- "Message failed" or "Message stopped" text
- Retry button to resend the message
How Retry Works
- Click the Retry button on the failed message
- The same message is sent again
- A new execution starts from that point
- Previous failed response is preserved in history
Subagent Display
When Claude spawns a subagent using the Task tool:
Subagent Block
Subagent conversations are grouped visually:
- Distinct border and background
- Subagent type indicator
- Collapsible child messages
- Result summary when complete
Nested Conversations
Subagents can:
- Use their own tools
- Have their own thinking blocks
- Return results to parent agent
Permissions System
Sciorex has a sophisticated permission system that balances AI capability with user control.
Permission Flow Types
There are two permission handling flows:
Reactive Flow (Default)
The reactive flow waits for Claude to attempt a tool call, then asks for permission:
- Claude decides to use a tool
- Execution pauses
- Permission modal appears
- You approve or deny
- Execution continues or stops
Proactive Flow (MCP Permissions)
When "Use MCP Permissions" is enabled, permissions are handled proactively:
- Before executing, the MCP server checks permissions
- If permission needed, request is sent to app
- Permission modal appears
- You approve or deny
- Result is sent back to MCP server
Configuring MCP Permissions
Enable MCP Permissions in Settings Chat Defaults Use MCP Permissions.
Permission Modal
When a permission is requested, you'll see a modal with:
- Tool name - What Claude wants to use
- Input details - What it wants to do
- Approve button - Allow this action
- Deny button - Block this action
- Remember checkbox - Apply decision to future similar requests
Permission Modes in Detail
Ask for All (Normal Mode)
Every tool call requires explicit approval:
User: "Create a file called hello.txt"
Claude: [Requests Write tool permission]
Modal: "Claude wants to create file: hello.txt. Approve?"
Best for: Learning Claude's behavior, sensitive codebases, unfamiliar tasks.
Auto-approve Edits
File operations are auto-approved, but bash commands still require permission:
User: "Refactor the login function"
Claude: [Automatically approved: Edit, Write, Read]
Claude: [Requires approval: Bash commands]
Best for: Active development sessions where you trust Claude's file edits.
YOLO Mode
All tool calls are auto-approved with no prompts:
User: "Set up the entire project"
Claude: [All operations execute without prompts]
Best for: Trusted tasks, sandboxed environments, or when you want to observe Claude's full autonomous capability.
Branching Conversations
Branching lets you explore alternative approaches without losing your original conversation.
Types of Branches
Soft Branch
A soft branch continues from the end of the current conversation:
- Type your message
- Click the dropdown arrow on Send
- Select "Send & Branch"
This creates a new session that continues from the same point.
Hard Fork
A hard fork branches from a specific message in the conversation:
- Find the message you want to fork from
- Click the fork icon on that message
- Type your new direction
- The Fork button replaces Send
This creates a branch from that exact point, not the end.
Navigating Branches
Fork Indicators
Sessions show fork status:
- Has branches - Shows count of sessions forked from this one
- Is a fork - Shows indicator that this is a branched session
Parent Navigation
When viewing a forked session:
- A banner shows "Forked from: [parent session]"
- Click "Go to parent" to navigate to the original
Context Display
Toggle "Show parent context" to see messages from before the fork point.
Plan Mode
Plan Mode provides structured implementation planning before code changes.
How It Works
- Activate Plan Mode from the command palette (
Ctrl+Shift+P> "Plan Mode") or by prefixing your message with/plan - The AI analyzes the codebase and creates a step-by-step implementation plan
- Review the plan - approve, modify, or reject individual steps
- Once approved, the AI executes the plan with progress tracking
When to Use Plan Mode
- Large features that touch multiple files
- Refactoring where you want to review the approach first
- Architectural changes that need careful planning
- Learning - see how the AI approaches a problem before it acts
TIP
Plan Mode works best with high-capability models like Claude Opus 4.6 or GPT-5.3 Codex that can reason through complex implementation strategies.
Real-time Features
Live Updates
The chat view updates in real-time:
- New messages appear instantly
- Tool execution progress is shown
- Status changes are reflected immediately
Scroll Behavior
Smart scrolling keeps you at the bottom during active conversations:
- Auto-scrolls when new content arrives
- Pauses auto-scroll if you scroll up
- "New messages" button appears when you're not at bottom
Background Tasks
Long-running bash commands show in a dedicated panel:
- Command and description displayed
- Status indicator (running/completed/killed)
- Kill button to terminate
Todo Tracking
When Claude uses the TodoWrite tool, a todo panel appears:
- Shows current task list
- Progress statistics
- Completion status for each item
Find in Chat
Search within the current conversation using Ctrl+F (or Cmd+F on macOS).
Features
- Full-text search across all messages in the session
- Highlights matching text in context
- Navigate between matches with arrow buttons or
Enter/Shift+Enter - Search includes tool calls, results, and thinking blocks
- Case-insensitive by default
Press Escape to close the search bar.
Slash Commands
Type / to access slash commands:
| Command | Description |
|---|---|
/add-dir | Add a directory to context |
/clear | Clear conversation |
/compact | Toggle compact mode |
/config | Show configuration |
/cost | Show token cost |
/doctor | Run diagnostics |
/help | Show help |
/init | Initialize project |
/memory | Manage memory |
/model | Change model |
/pr-comments | Handle PR comments |
/release-notes | Generate release notes |
/review | Code review |
/terminal-setup | Setup terminal |
/vim | Toggle vim mode |
Using Slash Commands
- Type
/at the start of your message - A dropdown appears with available commands
- Type to filter or use arrow keys to navigate
- Press Enter to execute
Mentions System
Type @ to mention files, directories, URLs, tickets, and more:
| Type | Prefix | Description |
|---|---|---|
| File | @file | Reference a specific file in the workspace |
| Directory | @dir | Reference a directory and its contents |
| URL | @url | Include content from a web URL |
| Ticket | @ticket | Reference a ticket from the board |
| Epic | @epic | Reference an epic and its tickets |
| Conversation | @conversation | Reference another chat session |
| Flow | @flow | Reference a flow definition |
| Execution | @execution | Reference a flow execution |
| Library | @library | Reference items from the reference library |
Using Mentions
- Type
@in your message - A dropdown appears with mention categories
- Select a category or start typing to filter
- Browse and select the item to reference
- The reference is inserted as a rich mention chip
Claude will receive the content of mentioned items as context. For tickets and epics, this includes metadata, descriptions, and linked sessions.
Keyboard Shortcuts
| Shortcut | Action |
|---|---|
Enter | Send message (default) |
Shift+Enter | New line |
Tab | Cycle thinking levels |
Shift+Tab | Cycle permission modes |
Escape | Close modals, cancel operations |
/ | Navigate dropdowns |
Customizing Submit Shortcut
Change the submit shortcut in Settings Chat Defaults Submit Shortcut. Options include Enter, Shift+Enter, Ctrl+Enter, and Cmd+Enter.
Message Queue
You can queue follow-up messages while the AI is still responding:
- Type your next message while the AI is working
- Click Send or press Enter to queue it
- Queued messages are sent automatically when the current response completes
- A badge shows the number of queued messages
This lets you plan ahead without waiting for each response to finish.
Settings & Configuration
Chat Defaults
Configure in Settings AI Providers and Settings Chat:
| Setting | Location | Description |
|---|---|---|
| Default Provider | AI Providers | AI provider for new chats |
| Default Model | AI Providers | Model for new chats |
| Default Permission Mode | AI Providers | Initial permission level (Normal, Auto-approve, YOLO) |
| Default Thinking Level | AI Providers | Initial thinking depth |
| Thinking Budgets | AI Providers | Token limits per thinking level |
| Display Mode | Chat | How messages display (Extended, Compact, Focus) |
| Diff View | Chat | How edits display (Split, Unified) |
| Send Shortcut | Chat | Key combination to send messages |
| Open Links Externally | Chat | Open URLs in system browser |
See the full Settings Reference for all options.
Integration with Tickets
Linking Sessions
Sessions can be linked to tickets:
- From the session delete modal, choose "Archive"
- Select a ticket from the dropdown
- The session is preserved and accessible from the ticket
Viewing Linked Sessions
In the Ticket Detail panel:
- Go to the "Sessions" tab
- See all linked chat and agent sessions
- Click to open or view archived sessions
See Linking Sessions to Tickets for more details.
Notifications
Configure chat notifications in Settings Notifications:
| Setting | Description |
|---|---|
| Chat Complete | Notify when Claude finishes responding |
| Permission Request | Notify when permission needed |
| Interaction Request | Notify when Claude asks a question |
| Sound | Play notification sound |
| Desktop | Show system notifications |
Troubleshooting
Common Issues
Chat Won't Start
Symptoms: Clicking send does nothing or shows error.
Solutions:
- Check that your AI provider is configured correctly
- Verify network connectivity
- Check Settings API for path issues
Messages Not Appearing
Symptoms: Sent message but no response visible.
Solutions:
- Check the session status (may be "running")
- Wait for Claude to respond
- Scroll to bottom of conversation
Permission Modal Stuck
Symptoms: Permission modal appears but actions don't work.
Solutions:
- Try clicking Approve or Deny again
- Check for JavaScript errors in console
- Restart the application
Tools Not Available
Symptoms: Tool selector shows no tools.
Solutions:
- Wait for tool discovery to complete
- Restart application
- Check MCP server configuration
Related Documentation
- MCP Servers - Tool documentation and configuration
- Ticketing Dashboard - Link sessions to tickets
- Creating Agents - Configure specialized AI agents
- Extended Thinking - Deep reasoning capabilities